
Delivering real-world solutions that solve challenges and accelerate business growth.

Delivering impactful and customized software solutions to meet unique industry challenges.
Explore success stories that speak ROI, all powered by advanced technology and AI.
Explore how Agentic AI streamlined operations and improved workflows to drive overall revenue growth.
Refined regulatory processes, cut compliance workload, & streamlined institutional workflows.
Integrating AI for simplified legal research and document management, offering improved case handling.
Access thought leadership, trends, and innovation-driven business resources anytime.

Explore expert articles on AI, RPA, and custom software development.
Expert-curated content to streamline your HubSpot operations efficiently.
Gain expert analysis on AI trends and actionable strategies for growth.
Browse our eBooks packed with strategies to scale, optimize, and innovate.
Expertly crafting reliable, scalable solutions focused on your long-term success.
.png?width=344&height=101&name=Mask%20group%20(5).png)
Have questions in your mind, we are just a click away! Get in touch now.
Solving business challenges through intelligent software solutions.
A vibrant culture that encourages growth, learning, and meaningful contributions.
Join a forward-thinking team that is building the future of software solutions.
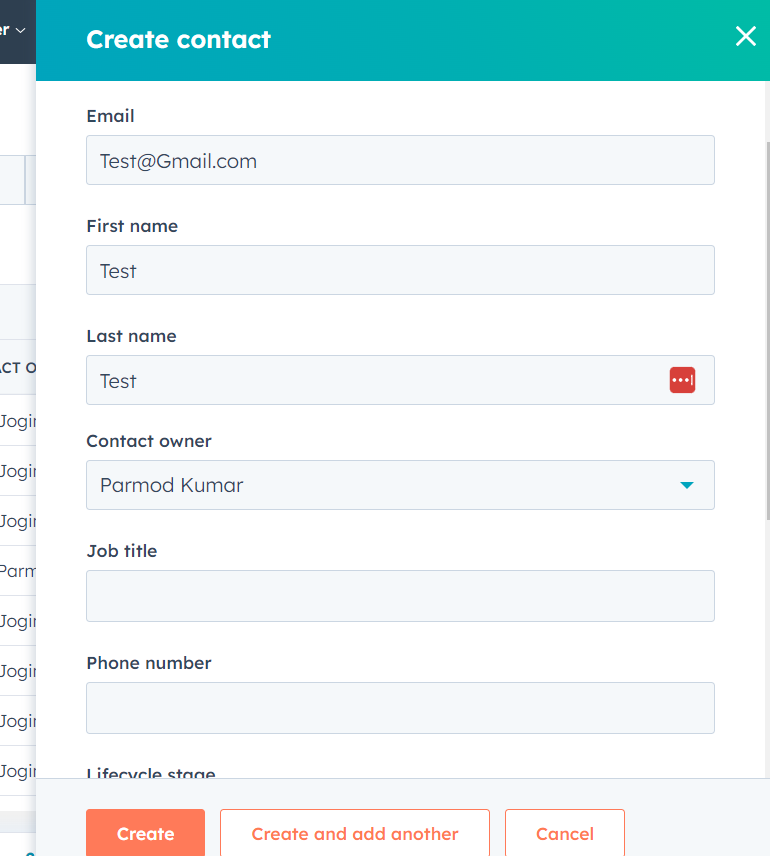
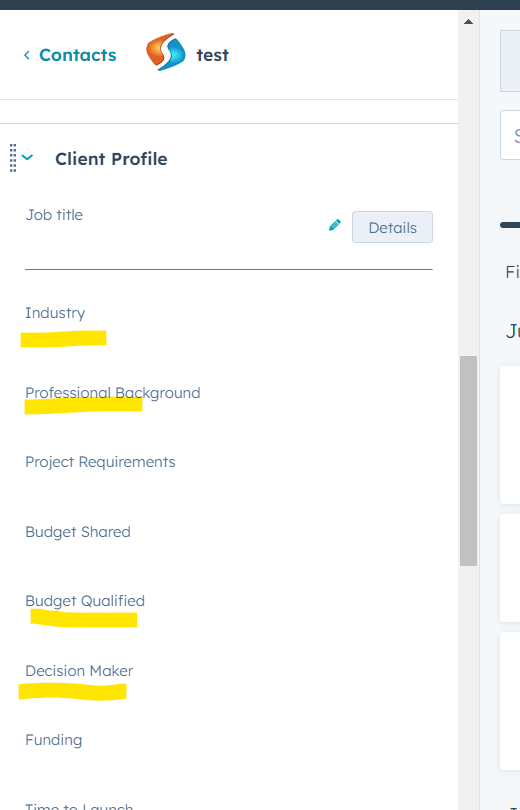
Adding leads manually to your CRM system is a fundamental step in maintaining accurate and comprehensive lead information. Ensuring the completeness and accuracy of these details is crucial for effective lead management and successful conversions.

This step-by-step guide empowers you to ensure the completeness of lead details and the precise attribution of sources, enhancing your lead management strategies and laying a strong foundation for successful interactions and conversions.
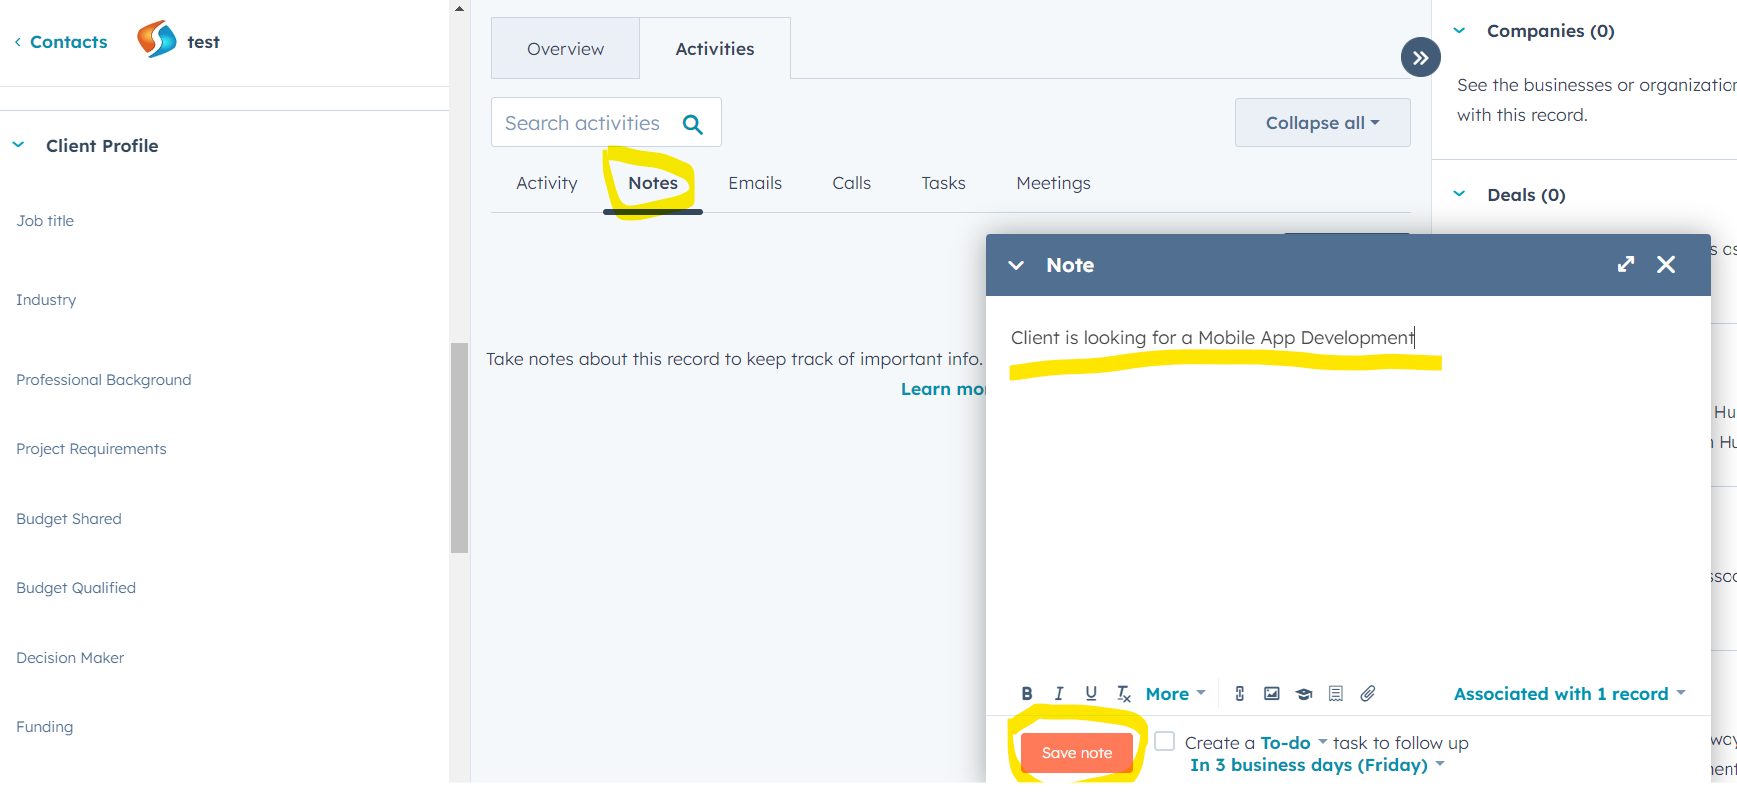
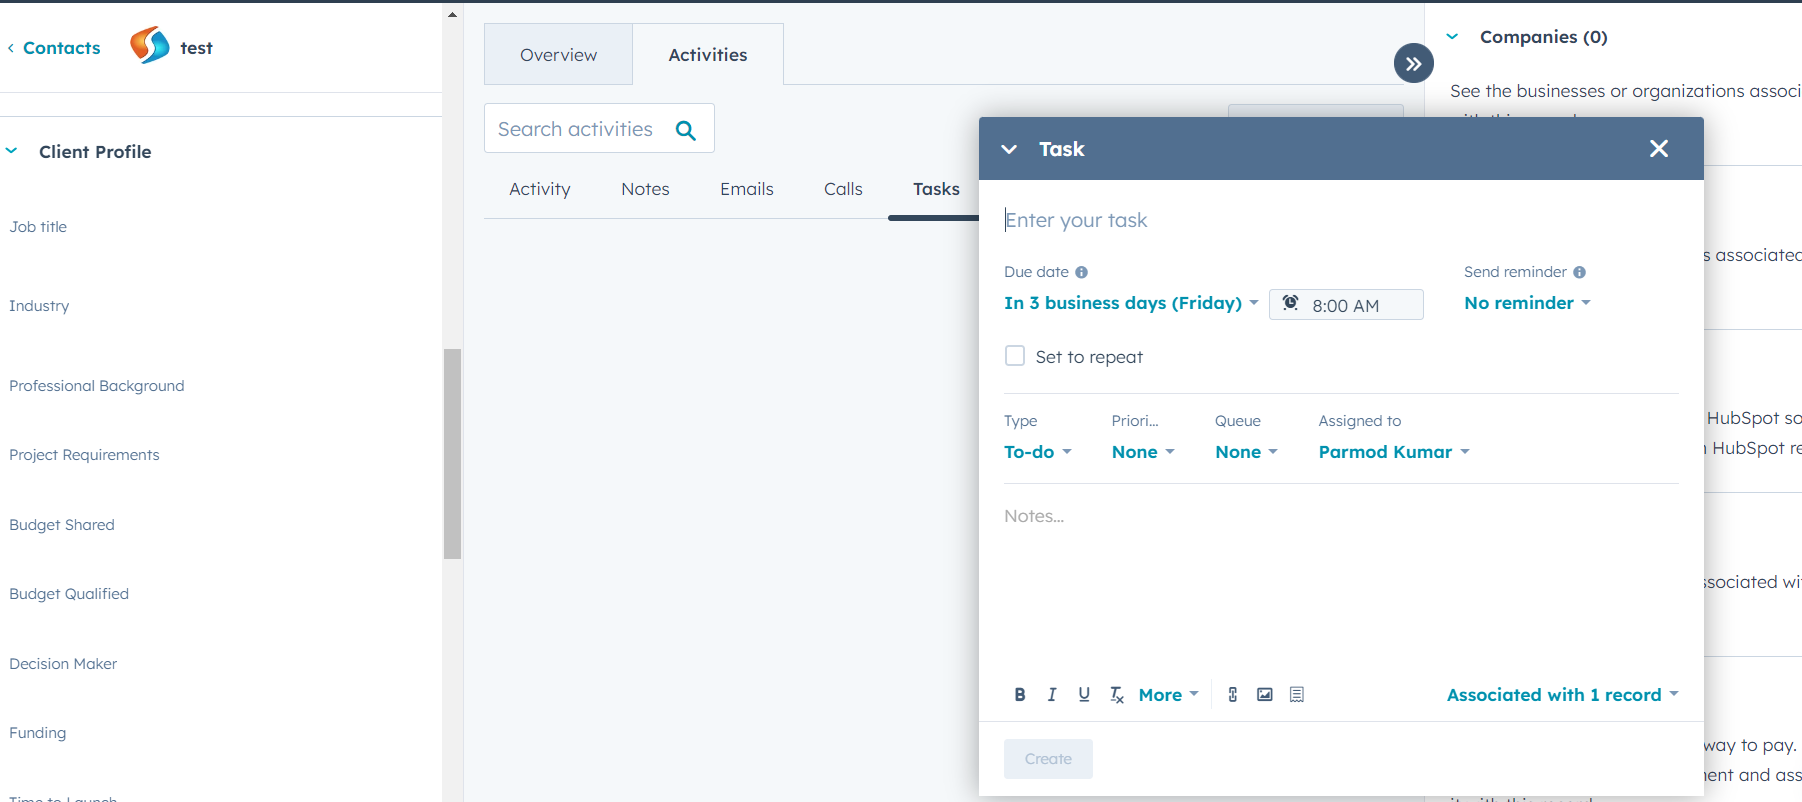
Below is the Step-by-Step Guide to Adding Leads Manually to the CRM System:


Set up a follow-up action, like scheduling a call or sending an email, to engage with the lead promptly.
Manually adding leads to your CRM system involves meticulous attention to detail and the inclusion of accurate information.


Get custom solutions, recommendations, estimates, confidentiality & same day response guaranteed!
Talk to Our Experts
Get In Touch

Lead status definitions in HubSpot CRM provide insights into the progression of leads through the...

This comprehensive guide outlines step-by-step procedures for scheduling, setting reminders,...

Tailoring your lead statuses in HubSpot according to your unique sales cycle can significantly...
Leverage AI, automation, and modern engineering to accelerate growth and efficiency.
1000+ successful projects delivered by 200+ certified experts.


