Implementing Lead Source Tracking in HubSpot CRM
Implementing lead source tracking in HubSpot CRM is crucial for understanding the origins of your leads and optimizing your marketing efforts. By meticulously identifying the sources and channels that drive lead generation, you can refine your strategies for enhanced conversions and more informed decision-making.
Below is the Step-by-Step Guide to Implement Lead Source Tracking in HubSpot CRM -
Step 1: Accessing Tracking Settings
- Log in to your HubSpot account.
- Navigate to the main menu and click on "Settings."
Step 2: Creating Custom Properties
- In the left sidebar, find and select "Objects" and then click on "Properties."
- Click on the "Create a property" button.
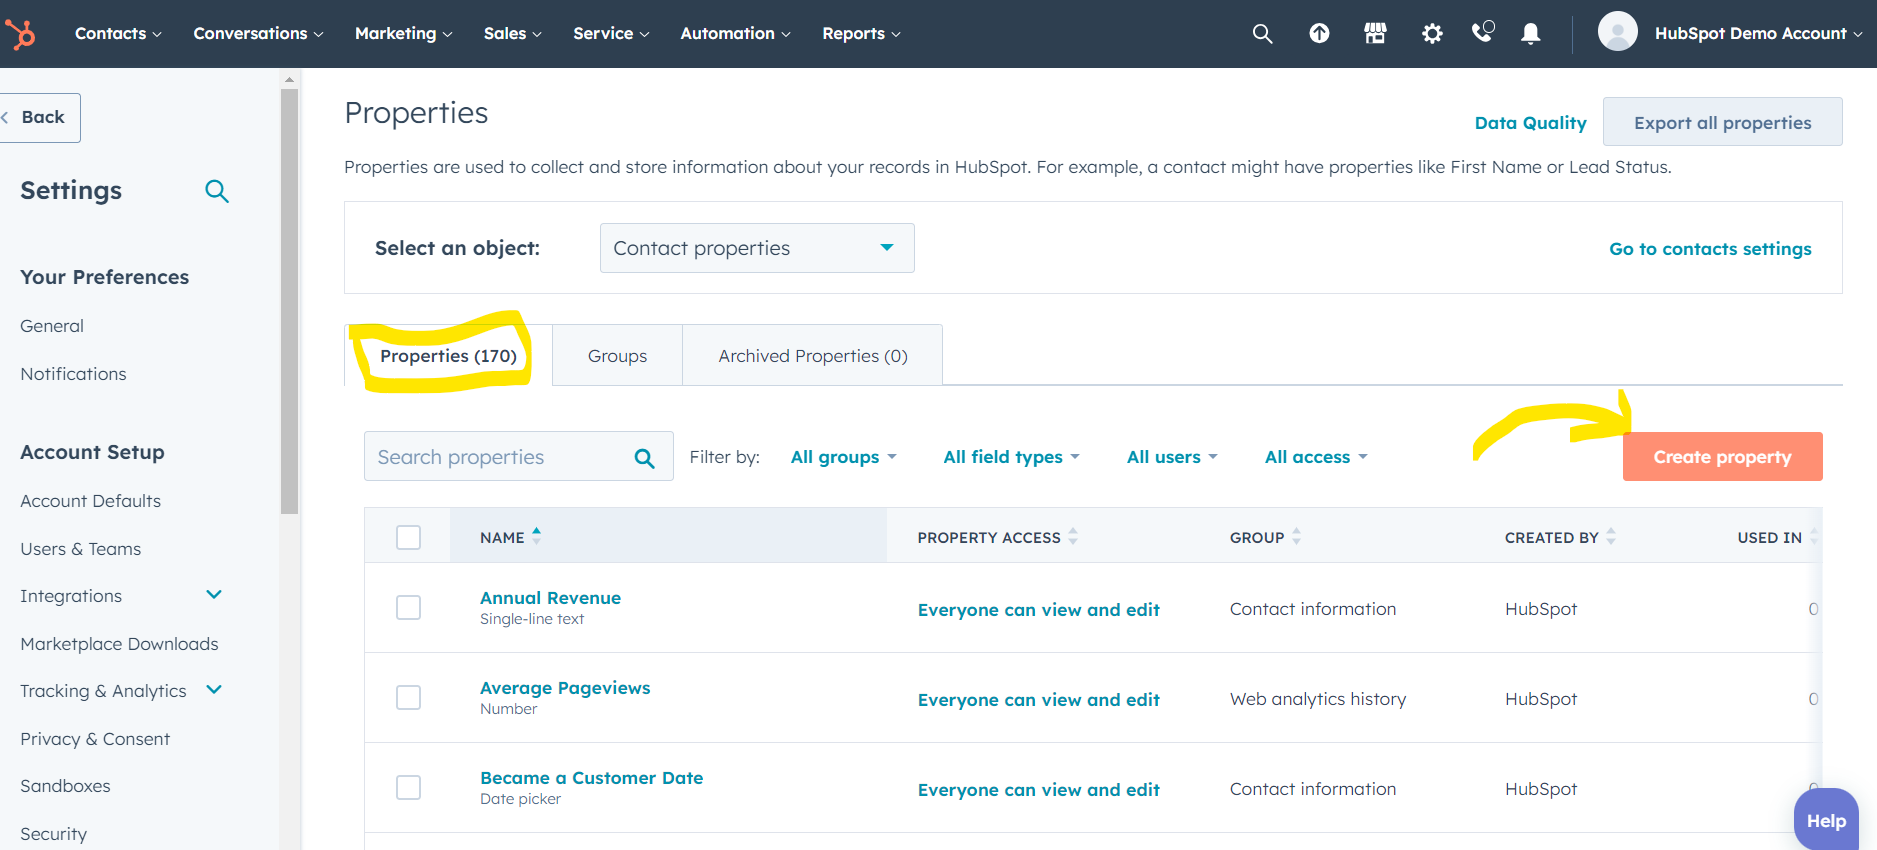
- Choose "Single line text" as the property type.
- Enter a name for the property, such as "Lead Source" or "Source Channel."
- Optionally, add a description to clarify the purpose of the property.
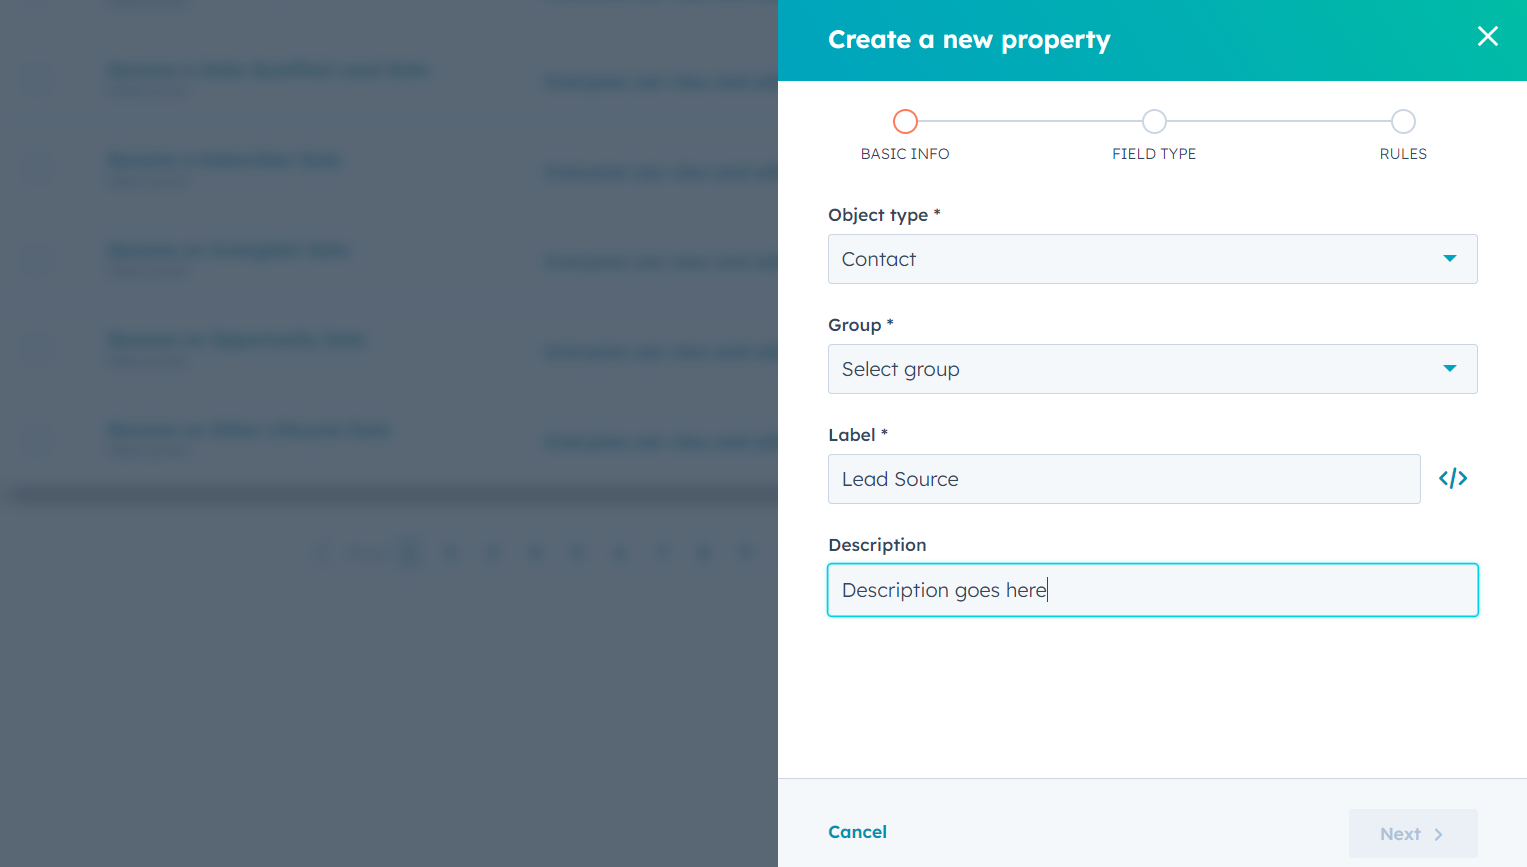
- Click "Save" to create the custom property.
Step 3: Assigning Lead Source
- After creating the custom property, go to a contact's record.
- Scroll down to the custom property section.
- Enter the relevant source or channel from which the lead originated, such as "Google Ads," "Social Media," or "Referral."
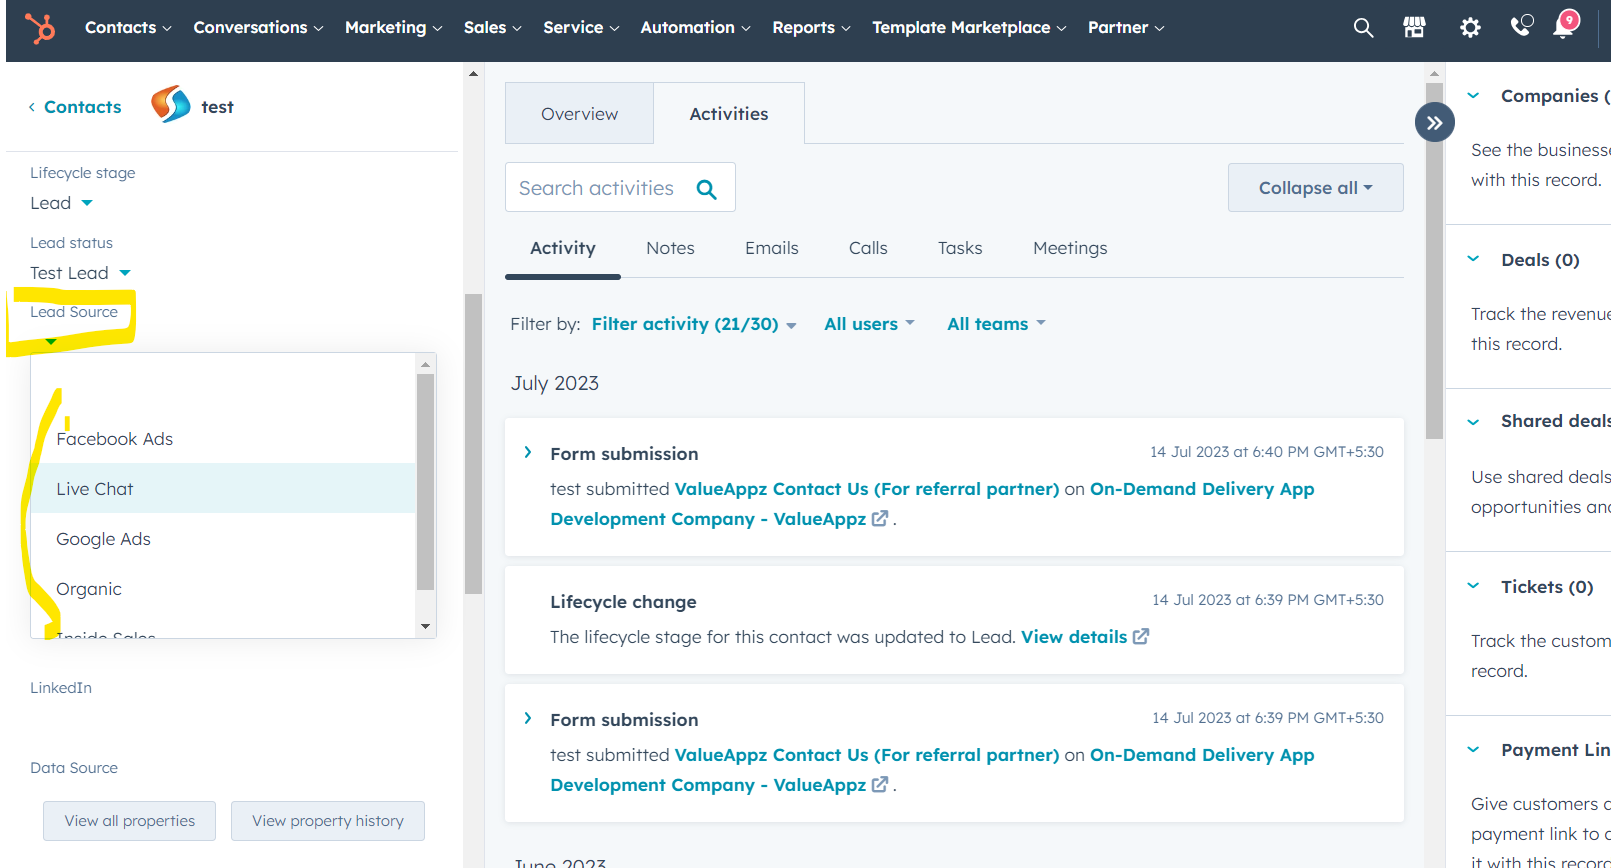
- Save the changes to record the lead source.
Step 4: Reporting and Analysis
- Return to the contacts and click on Advanced Filters
- In Search Box, Search for "Lead Source"
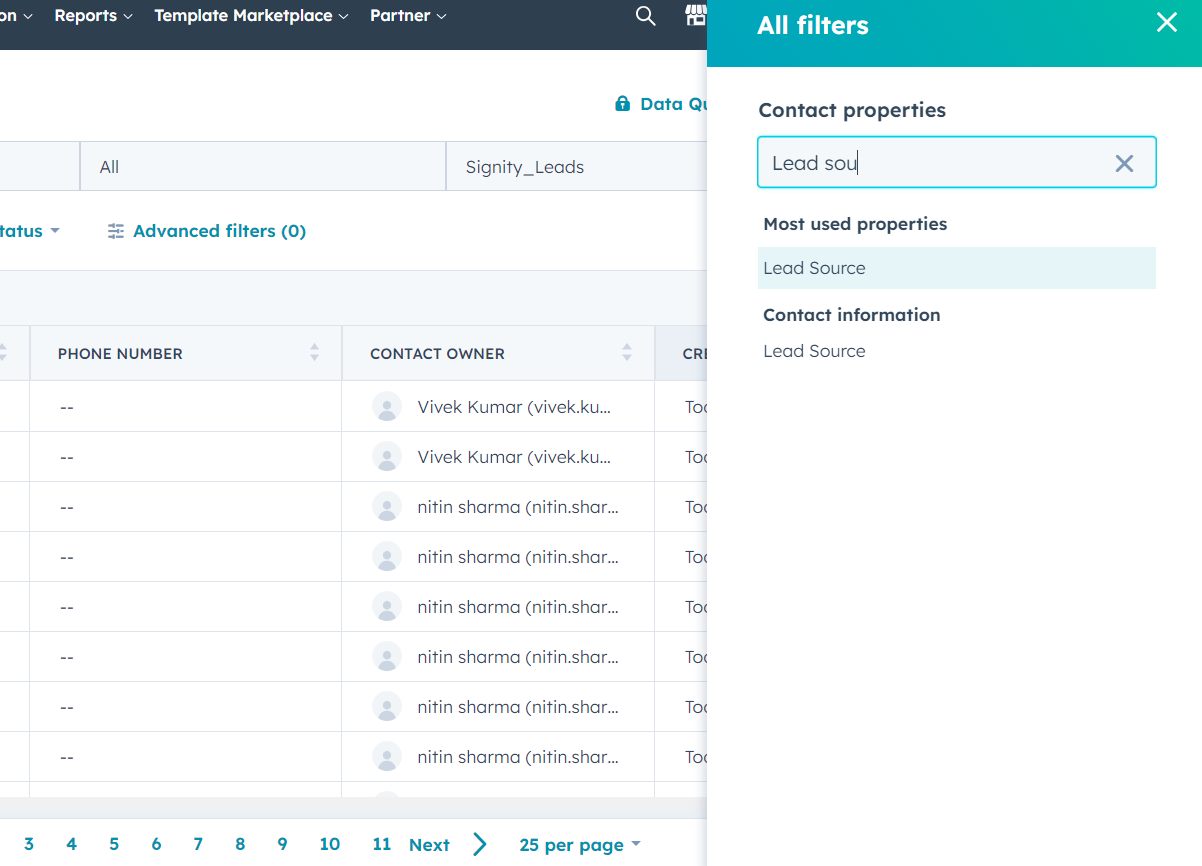
- Now, we can choose the lead source against which we want to generate the report, let's say "Google Ads" for this report
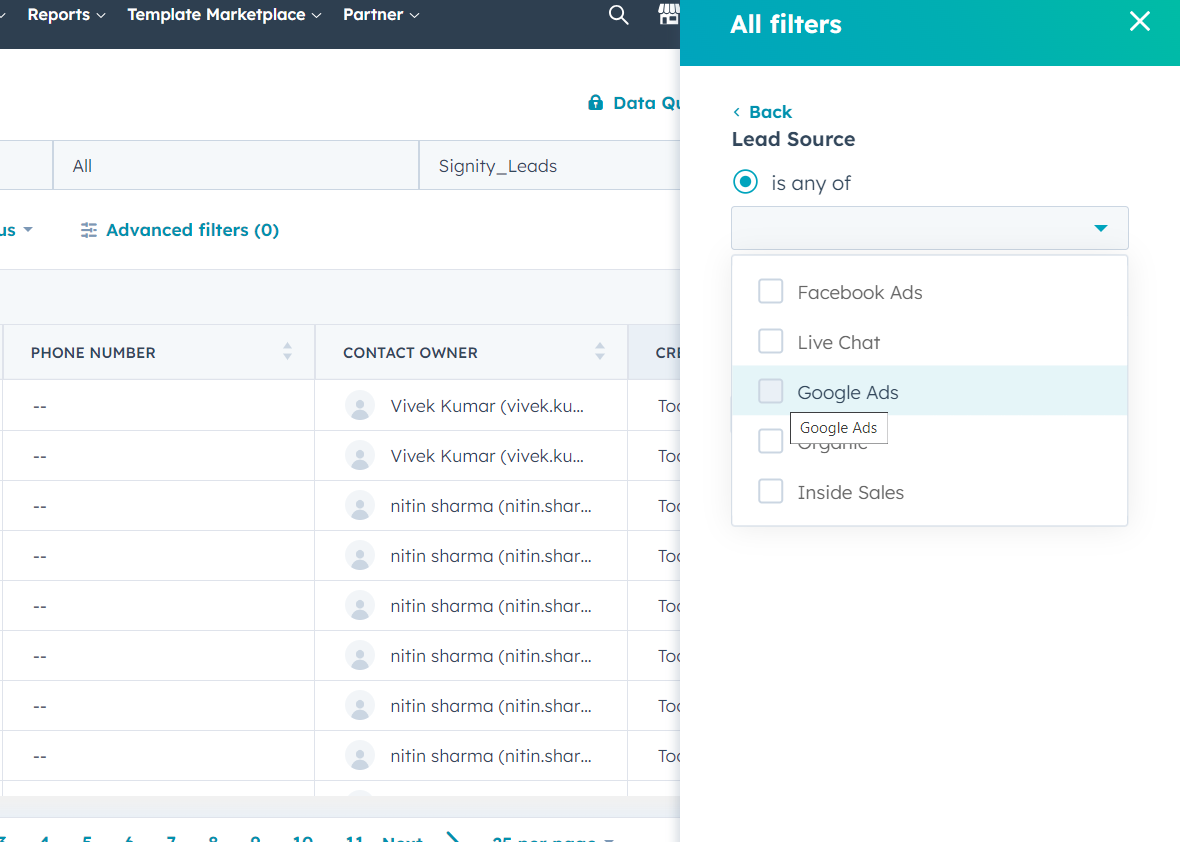
- After choosing the desired filter, we will come up with all contacts who are captured from Google leads.

To conclude, Incorporating lead source tracking into HubSpot CRM enables you to gain valuable insights into the origins of your leads. This step-by-step guide empowers you to accurately attribute leads to their respective sources and channels, facilitating data-driven decision-making, targeted marketing strategies, and ultimately, improved lead conversion rates.


