Stable Diffusion: Creating Striking AI-Generated Visuals
Stable Diffusion is an advanced AI model known for generating high-quality images from text prompts. Its versatility allows for inpainting, outpainting, and rapid image generation, making it a valuable tool for designers and artists. The model's open-source platform and reversible diffusion process offer precise control, making it popular for generative AI.
Artificial Intelligence has taken creative endeavors to new heights, and one of the groundbreaking techniques at the forefront is Stable Diffusion. In this comprehensive guide, we will delve into the intricacies of using Stable Diffusion to create awe-inspiring AI-generated images. Let's embark on a journey that demystifies the process and empowers you to harness the full potential of this cutting-edge technology.
Stable Diffusion stands out as an exceptionally versatile AI image generator. It operates under an entirely open-source framework, allowing users to train custom models tailored to their specific datasets, ensuring the generation of precisely desired images.
This implies numerous avenues for utilizing Stable Diffusion. You have the option to download and run it on your personal computer, establish your model with Leap AI, or access the API through platforms like NightCafe. However, I'll guide you through the two most straightforward options, both facilitated by Stability AI, the creators of Stable Diffusion:
Using Stable Diffusion with Clipdrop
Clipdrop offers an AI image editing service that includes access to Stable Diffusion XL, the most recent Stable Diffusion model. The best part is, that it's remarkably easy to use, making it an excellent option for experimenting with a generative AI model. Plus, you don't require an account to get started.
- Go to Clipdrop and choose Stable Diffusion XL.
- Type in a message or idea, then click the generate button.
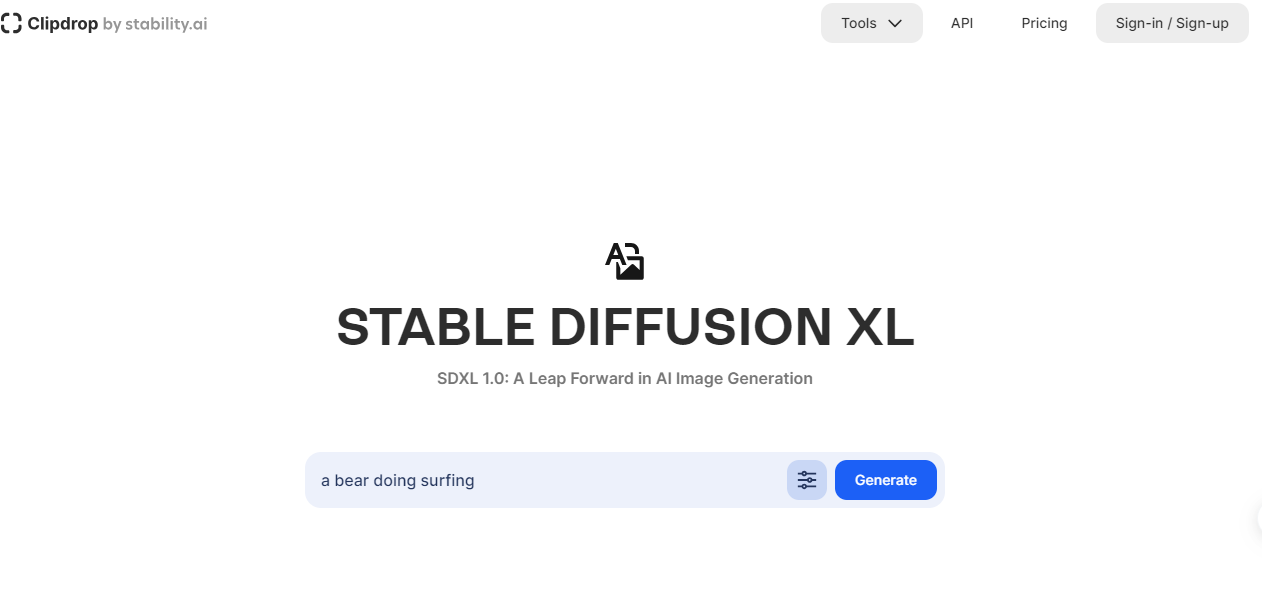
- When you enter the prompt, Stable Diffusion creates four images, each depicting the described scene.
Stable Diffusion does more than just create pictures; it can also help fix up our images. After making an image, we can press the Edit button at the top right to do things like:
- Adjust Lighting
- Make it Bigger
- Uncrop
- Expand the View
- Change the Background
However, for a more extensive exploration of your choices, consider checking out DreamStudio instead.
How to use Stable Diffusion with DreamStudio
The Clipdrop app is convenient, but the official Stable Diffusion web app, DreamStudio, offers more control and does not watermark images by default, making it a preferred option.
To sign up for DreamStudio, you can follow these steps:
- Visit the DreamStudio website at https://beta.dreamstudio.ai.
Click on the "Login" button. - You may be able to create an account using Google or Discord credentials. If not, you can try accessing the signup page directly through the following link: https://web.dreamstudio.com/net/member/join.aspx.

- Select the Style by choosing the style of the image you want to create.
- Adjust Settings and Customize the image creation process by adjusting the settings according to your preferences.
- Set Parameters and Enter the Prompt.
- After entering the prompt, click on the "Dream" button, and DreamStudio will commence creating your image.
- To illustrate, an example prompt could be "bear doing cooking".
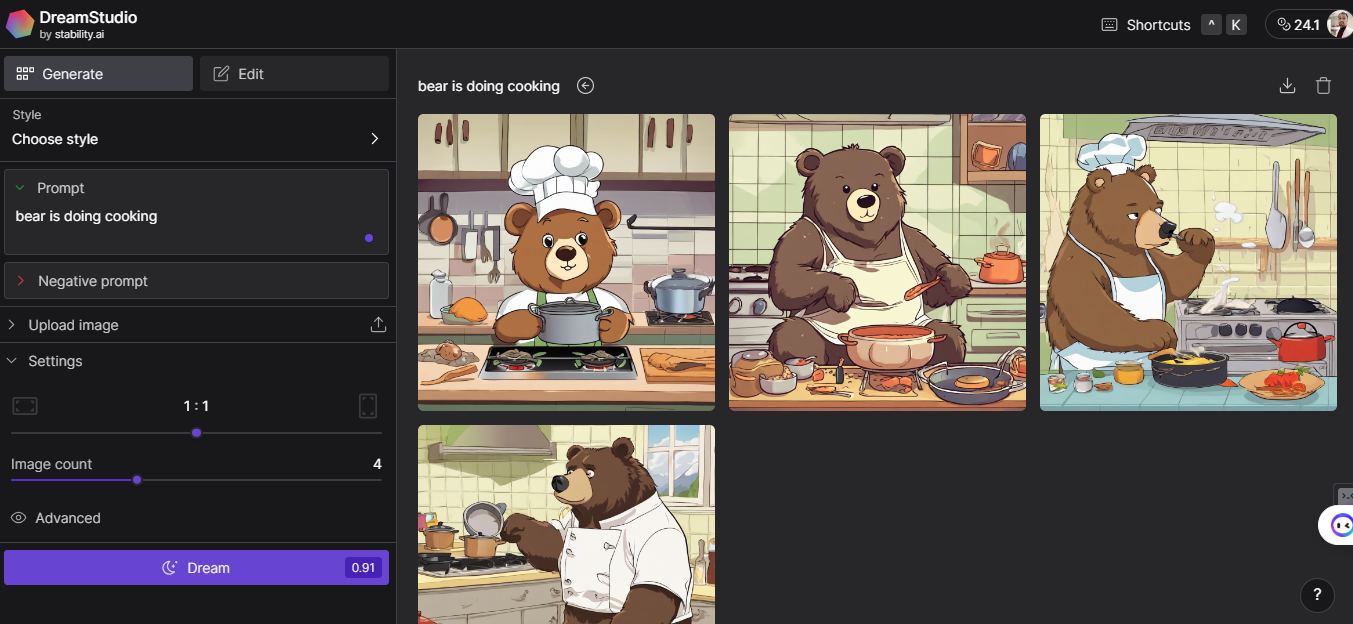
The Negative prompt box enables you to specify what you don't want in your image. While it may not be as effective as desired, it can still influence the direction of your generated images. I have added a comment riverside so, their will be no background of the riverside.
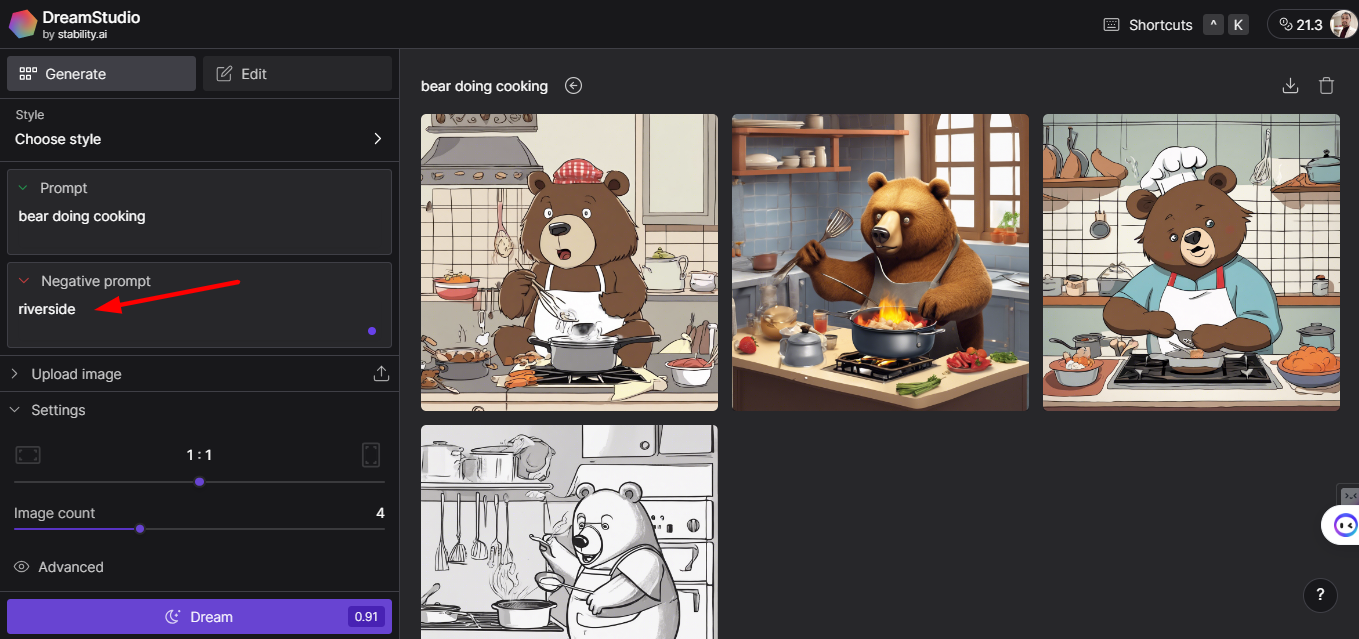
Within DreamStudio, the Image box allows you to upload an image for use in your prompt. This feature is highly potent, giving you control over the composition, color, and various details of the image.
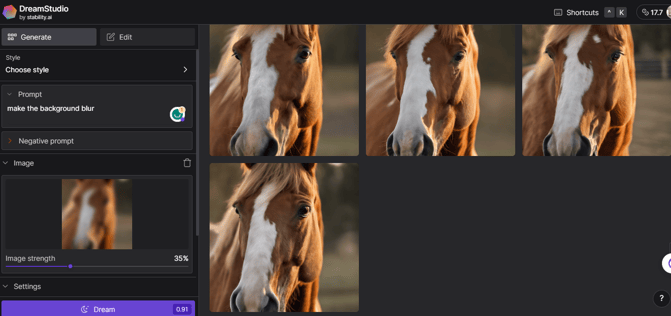
In the images above, I've used the prompt "make the background blur.
How to edit images with Stable Diffusion
DreamStudio provides support for inpainting and outpainting, which allows you to modify the details of an image or expand it beyond its borders using an AI art generator. To use this feature, follow these steps:
- Click on the "Edit" option located at the top of the left sidebar.
- Create a new image or import one from your computer.
- Use the arrow tool to select an overlapping area, enter a prompt, and click on the "Dream" button. You will receive four potential options for expanding your canvas.
- Alternatively, you can use the eraser tool to delete something from an image and then replace it using a prompt.
Conclusion
Stable Diffusion opens the door to a realm where artificial intelligence and creativity converge. This guide aims to empower you with the knowledge and skills needed to embark on your journey of creating mesmerizing AI-generated images. Unleash your artistic potential and redefine the boundaries of digital creativity with Stable Diffusion as your guide.


